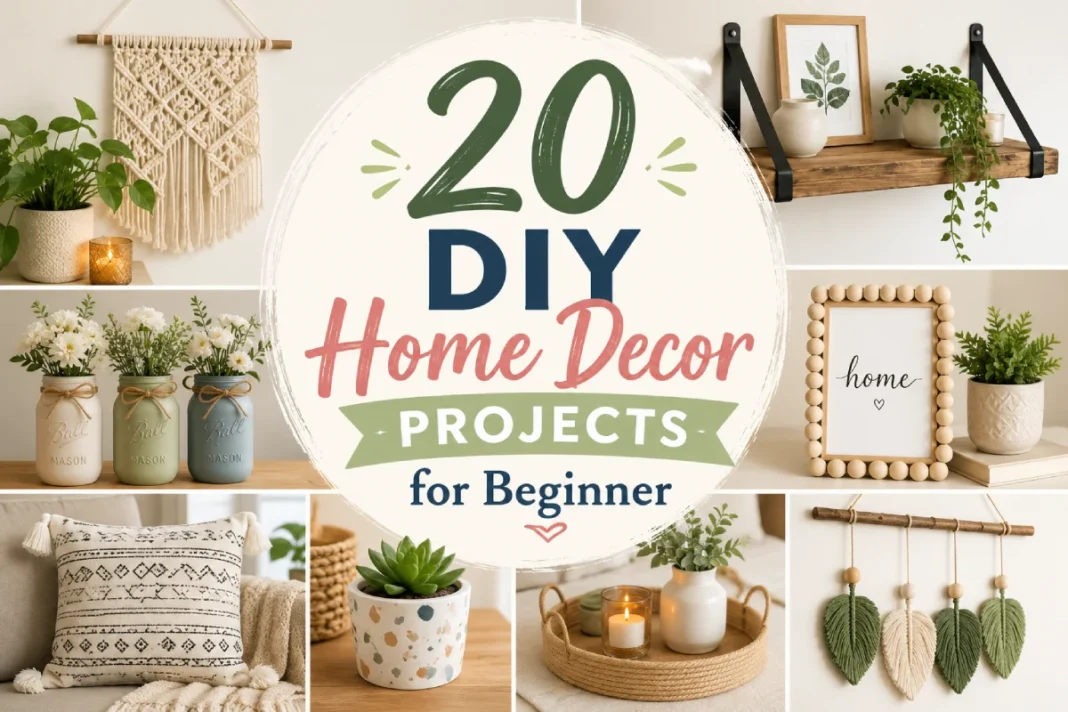
You walk into a room, and something feels… unfinished. The walls are painted, the furniture is fine, but there’s no you in the space. That missing spark? It’s personality. And you don’t need a big budget to add it. A few handmade touches can turn a generic room into a place that feels entirely yours.
I’ve spent over a decade helping homeowners style spaces without overspending. The secret isn’t more shopping — it’s making. I’m sharing 20 DIY home decor projects that cost $100 or less each. Every project comes with a clear skill level, a materials list, an estimated time, step-by-step directions, and a pro tip you’ll actually use.
You won’t need fancy tools or a workshop. Just a free afternoon, a can-do attitude, and the belief that your home deserves handmade luxury.
Easy DIY Home Decor Projects (Beginner)
These five projects require no special skills. If you can cut paper, tie a knot, or use double-sided tape, you’re ready.
1. Painted Mason Jar Vase
Skill Level: Beginner
Estimated Time: 25 minutes (plus drying)
Estimated Cost: $30–$60
Materials:
- Clean glass jar (pasta sauce or pickle jar)
- Acrylic paint in one or two colors (use leftover craft paint)
- Paintbrush
- Masking tape (optional, for stripes)
- Sandpaper (120-grit, optional)
Steps:
- Wash the jar and remove the label. Soak in warm soapy water if needed. Dry completely.
- If you want a stripe pattern, wrap masking tape around the jar where you’d like the glass to show through.
- Apply two thin coats of acrylic paint to the outside of the jar. Let the first coat dry for 15 minutes before adding the second.
- For a matte, slightly distressed look, lightly sand the raised areas once the paint is dry. Focus on the rim and any lettering on the glass.
- Peel off the tape while the paint is still slightly tacky for clean lines.
- Fill with fresh or dried flowers. No water needed if you use dried stems — that keeps the paint intact.
Pro Tip: Mix a tablespoon of baking soda into the paint to create a chalky, stone-like finish — similar to specialty chalk paint but at a fraction of the cost.
2. Washi Tape Photo Frame
Skill Level: Beginner
Estimated Time: 15 minutes
Estimated Cost: $10–$40
Materials:
- Plain cardboard or an old photo frame (even one with no glass)
- Washi tape in 2–3 patterns
- Scissors
- Double-sided tape, repositionable adhesive putty, or Command strips
- Printed photo or postcard
Steps:
- Cut a piece of cardboard slightly larger than your photo. A rectangle with a 2-inch border looks best.
- Cover the border area entirely with washi tape. Overlap strips slightly and trim the edges neatly with scissors.
- Attach the photo to the center using double-sided tape.
- Press the corners of the photo down smoothly so they don’t curl.
- Hang the finished frame with adhesive putty pressed firmly onto the back. Press the putty against the wall for 10 seconds to secure it.
Pro Tip: Mix metallic and solid-colored tapes on the same frame. Gold and navy stripes together instantly elevate the look.
3. Fabric Scrap Bunting
Skill Level: Beginner
Estimated Time: 30 minutes
Estimated Cost: $0–$50 (scraps are free, bias tape may cost $20)
Materials:
- Fabric scraps (old shirts, cotton remnants)
- Bias tape or sturdy ribbon, about 3 meters long
- Scissors
- Pins or clips
Steps:
- Cut fabric into triangles. Make a template from cardboard — roughly 6 inches wide at the top and 8 inches long from top to point.
- Cut 10–15 triangles. Mix colors and patterns for a cheerful look.
- Fold the bias tape in half lengthwise and pin the top edge of each triangle inside the fold. Leave 4 inches of empty tape at each end for hanging.
- Space the flags about 2 inches apart.
- Once all flags are pinned, sew along the bias tape with a straight stitch. No sewing machine? Use fabric glue pressed firmly under a heavy book until dry.
- Hang the bunting across a window, headboard, or blank wall.
Pro Tip: Fray the bottom edges of the triangles slightly by pulling a few threads. That soft, worn look suits boho and farmhouse styles.
4. Repurposed Tin Can Pencil Holder
Skill Level: Beginner
Estimated Time: 20 minutes
Estimated Cost: $0–$20
Materials:
- Clean, empty tin can (label removed)
- Wrapping paper, old map, or magazine page
- White glue or Mod Podge
- Scissors
- Foam brush or flat paintbrush
Steps:
- Measure the height and circumference of the can. Cut your decorative paper to match that size exactly.
- Brush a thin layer of glue onto the back of the paper.
- Wrap the paper around the can, pressing from the center outward to push out air bubbles.
- Overlap the seam by half an inch and press it firmly.
- Seal the paper with one more thin coat of glue on top. Let it dry completely — about 30 minutes.
- Use it to hold pens, makeup brushes, or kitchen utensils.
Pro Tip: Rub a used tea bag over the finished paper before the top coat dries to give it an antique, sepia-tone effect.
5. Pressed Flower Wall, Art
Skill Level: Beginner
Estimated Time: 40 minutes (plus 3–5 days for pressing)
Estimated Cost: $10–$50
Materials:
- Heavy books or a flower press
- Small flowers and leaves (ferns, baby’s breath, pansies)
- Cardstock or thick watercolor paper
- Clear-drying craft glue
- Scissors
- Old frame or a clip frame
Steps:
- Place fresh flowers between sheets of blotting paper or printer paper inside a heavy book. Stack more books on top. Leave for 3 to 5 days.
- Arrange dried flowers on the cardstock without glue first. Play with composition.
- Once you like the layout, lift each bloom and dab a tiny dot of glue on the back. Press it gently in place.
- Let the glue dry for 15 minutes.
- Frame the art behind glass. This keeps humidity from damaging the petals.
- Hang it in indirect light — direct sun fades pressed botanicals quickly.
Pro Tip: Use a black-and-white botanical sketch as a background. The contrast makes pressed flowers pop dramatically.
Intermediate DIY Home Decor Projects
These 10 projects need more patience, maybe a craft knife, and a willingness to follow steps carefully. They’re still very doable, and the results look anything but homemade.
6. Macramé Plant Hanger (Simple Design)
Skill Level: Intermediate
Estimated Time: 1.5 hours
Estimated Cost: $50–$90
Materials:
- 3 mm cotton macramé cord, 20 meters total
- Metal or wooden ring (approx. 1.5 inches)
- Scissors
- Measuring tape
- Pot (a small terracotta one works well)
Steps:
- Cut four cords, each 5 meters long. Fold each in half and attach to the ring using a lark’s head knot. You’ll have eight strands.
- Group them into four pairs. Tie a square knot with each pair, about 12 inches below the ring.
- For the net: skip two strands, then join a right strand from one pair with the left strand from the adjacent pair, and tie a square knot. Repeat around to create a row of knots.
- Measure 4 inches down and repeat the alternating square knot pattern. This forms the basket.
- Test-fit your pot. The knots should sit just below the widest part so the pot can’t slip through.
- Gather all strands, tie an overhand knot tightly just beneath the pot, and trim the fringe to your desired length.
- Hang from a ceiling hook.
Pro Tip: Use two colors of cord, alternating pairs. A neutral cream and charcoal gray pairing adds a modern, tailored look.
7. Stenciled Cushion Cover
Skill Level: Intermediate
Estimated Time: 45 minutes
Estimated Cost: $40–$80
Materials:
- Plain cotton cushion cover (a beige or white one you already own)
- Fabric paint or acrylic paint mixed with textile medium
- Stencil (make one from freezer paper, or use a store-bought plastic stencil)
- Stencil brush or dense foam sponge
- Cardboard to insert inside the cover
- Painter’s tape
Steps:
- Insert cardboard into the cushion cover to keep the paint from seeping through.
- Position the stencil and secure it with painter’s tape so it won’t shift.
- Dip the brush lightly into the paint — less is more. Dab excess onto a paper towel. You want a nearly dry brush.
- Tap the paint straight up and down over the stencil openings. Don’t swipe; that pushes paint under the edges.
- Let it dry for 10 minutes, then carefully lift the stencil.
- Heat-set the design with a dry iron (no steam) for 3 minutes on the reverse side of the fabric.
- Remove the cardboard, insert the cushion pad, and fluff.
Pro Tip: If you want a perfectly imperfect, artistic feel, skip the stencil brush and use a sea sponge. It gives a soft, watercolor-style edge.
8. Rope-Wrapped Mirror
Skill Level: Intermediate
Estimated Time: 1 hour
Estimated Cost: $60–$100
Materials:
- Small round or oval mirror (a plain one without a frame)
- Sisal or jute rope, 6–8 mm thick
- Hot glue gun and glue sticks
- Scissors
- Cardboard backing slightly larger than the mirror (optional, for added stability)
- D-ring hanger
Steps:
- Clean the mirror edge with rubbing alcohol so glue sticks well.
- Start on the back of the mirror. Apply a line of hot glue to the rim and press the end of the rope into it. Hold for a few seconds.
- Continue wrapping the rope tightly around the mirror’s edge, adding glue every 2 inches. Make sure the coils sit side by side with no gaps.
- When you’ve covered the entire edge, cut the rope and secure the end to the back with glue.
- If you want a bulkier frame, wrap a second layer.
- Attach a D-ring hanger to the back with strong glue or by tying it around a rope coil before you finish.
- Hang it in an entryway or above a small console.
Pro Tip: Dip a strip of old cotton fabric in diluted white glue and wrap it around the rope in random sections for a hint of color and texture.
9. Upcycled Glass Bottle Fairy Light Lamp
Skill Level: Intermediate
Estimated Time: 30 minutes
Estimated Cost: $50–$90
Materials:
- Clean wine or beer bottle (remove labels)
- Battery-operated fairy lights (copper wire lights work best)
- Glass drill bit (optional — you can go cordless without drilling)
- Frosted glass spray paint (a small amount) or sheer ribbon
- Masking tape
Steps:
- If you want to hide the battery pack, drill a small hole near the base using a glass drill bit under running water. Skip this step if you’d rather just thread the lights through the opening.
- Feed the lights inside the bottle. Let the battery pack sit behind the bottle or tuck it into a small decorative box.
- For a soft glow, spray the outside of the bottle with a thin coat of frosted glass spray. Tape off the bottom if you want a clear window.
- Let the spray dry for 20 minutes.
- Arrange the wire so a few bulbs peek out of the mouth if you like.
- Turn on the fairy lights and place the bottle on a bedside table or mantel.
Pro Tip: Wrap thin twine around the neck of the bottle and tie a rustic bow. It hides the bottle’s lip and adds a handmade detail.
10. Geometric Cardboard Wall Art
Skill Level: Intermediate
Estimated Time: 1.5 hours
Estimated Cost: $20–$50
Materials:
- Sturdy cardboard (corrugated shipping box)
- Craft knife
- Metal ruler
- Cutting mat
- Acrylic paint in 2–3 colors
- Paintbrushes
- Hot glue or wood glue
- Pencil
Steps:
- Draw geometric shapes on the cardboard: triangles, hexagons, and trapezoids. Vary sizes from 4 to 8 inches across.
- Cut shapes using a craft knife and ruler for crisp edges. You’ll need about 12–15 pieces.
- Paint the front and sides of each shape. Use shades that complement your room. Let them dry.
- Arrange them on the floor into a larger composition — a honeycomb pattern or an asymmetrical cluster.
- Glue the pieces together where edges touch. Work on a flat surface and let the glue set for 30 minutes.
- Attach a sawtooth hanger to the back with hot glue, then hang the artwork.
Pro Tip: Paint the entire piece with one unifying wash of watered-down white paint and wipe it off immediately. It settles in the joints and creates a soft, unified patina.
11. No-Sew Fabric Wall Hanging
Skill Level: Intermediate
Estimated Time: 1 hour
Estimated Cost: $30–$80
Materials:
- A dowel rod or straight tree branch (about 2 feet long)
- One large piece of fabric (a fat quarter or an old saree scrap)
- Fabric scissors
- Hemming tape or fabric glue
- Cotton yarn or twine for hanging
- Iron
Steps:
- Wash and iron the fabric. Cut a rectangle roughly 18 by 30 inches.
- Fold the top edge over by 2 inches to create a rod pocket.
- Use hemming tape and an iron to bond the fold in place. Follow the tape’s instructions — usually a hot, dry iron with firm pressure for 8 seconds.
- Slide the dowel through the pocket.
- Cut two strips of fabric for hanging tabs, each about 6 inches long. Iron hemming tape along their edges to prevent fraying.
- Tie the strips around the dowel near each end and knot them.
- Hang the fabric panel and adjust the gathers evenly.
Pro Tip: Fray the bottom edge of the fabric up to 1 inch by pulling threads. It creates a soft fringe that looks intentional and premium.
12. Painted Terracotta Pots with Pattern
Skill Level: Intermediate
Estimated Time: 45 minutes (plus drying)
Estimated Cost: $30–$60
Materials:
- Two or three small terracotta pots
- Acrylic craft paint (at least two colors)
- Paintbrushes (a flat brush and a fine detail brush)
- Painter’s tape
- Sealer (clear spray or watered-down PVA glue)
- Potting soil and a small succulent (optional)
Steps:
- Wipe the pots clean and apply a base coat of white or pale paint. Let it dry.
- Use tape to create geometric patterns — triangles, stripes, or a diagonal half.
- Paint the exposed areas with a second color. Remove the tape while the paint is still slightly wet for sharp lines.
- Add hand-drawn dots or dashes with a fine brush and a contrasting color.
- Let everything dry for 1 hour.
- Seal the outside with a clear spray or a brush-on mixture of 1 part PVA glue to 2 parts water.
- Plant a succulent or use the pot as a pen holder.
Pro Tip: Paint the inside rim as well, about an inch down. When you look at the pot from above, that painted lip gives a finished, professional detail.
13. Decoupage Tray from a Cardboard Box
Skill Level: Intermediate
Estimated Time: 1.5 hours
Estimated Cost: $20–$60
Materials:
- Shallow cardboard box lid (like a shoe box lid)
- Decorative paper napkins (just the top printed layer)
- Mod Podge or homemade decoupage glue (equal parts white glue and water)
- Foam brush
- Acrylic paint for the edges
- Clear acrylic sealer spray (optional)
- Scissors
Steps:
- Paint the outer edges of the box lid with acrylic paint and let it dry.
- Separate the printed top layer of the napkin. Cut or tear it into sections that fit inside the lid.
- Brush a thin layer of decoupage glue onto the inside surface.
- Lay the napkin piece over the glue and press it down gently with your fingers. Work outward from the center to remove wrinkles.
- Once the entire inside is covered, apply another thin layer of glue on top of the napkin. Be gentle — the napkin is fragile.
- Let it dry for 1 hour. If desired, spray with a clear sealer for durability.
- Use the tray on a dresser to hold jewelry or keys.
Pro Tip: Use napkins with a bold, single flower motif and arrange them off-center. The space around it looks curated, not cluttered.
14. Small Braided Rag Rug (Coaster Size)
Skill Level: Intermediate
Estimated Time: 2 hours
Estimated Cost: $0–$40 (old fabrics and heavy thread)
Materials:
- Cotton fabric strips (old bed sheets cut into 1-inch-wide strips, about 15 feet total length)
- Heavy-duty thread and a large needle
- Scissors
- Safety pin
Steps:
- Tear or cut fabric into strips about 1 inch wide. Join them by cutting a small slit in the ends and knotting them together.
- Take three strips and knot them together at one end.
- Braid the three strips tightly, keeping even tension.
- When you have a braid about 6 feet long, start coiling it flat into a spiral.
- Thread a large needle with heavy thread. Stitch through the inner coils, catching both sides of the braid, to hold the spiral together.
- Continue coiling and stitching until the rug reaches a diameter of about 10 inches.
- Tuck the end under and stitch it securely.
Pro Tip: Mix striped and solid fabrics in the same braid. The stripe patterns confuse the eye and hide any uneven stitches.
15. Wire Photo Display Board
Skill Level: Intermediate
Estimated Time: 40 minutes
Estimated Cost: $40–$90
Materials:
- Galvanized garden wire (about 2 mm thick, flexible)
- Wire cutters
- Pliers
- Mini wooden clothespins
- Nails, adhesive hooks, or Command hooks
- Photos or postcards
- Spray paint (optional, for the wire)
Steps:
- Cut a length of wire roughly 2 feet long.
- Shape it into a gentle wave, a heart, or a simple straight line with a small loop at each end for hanging.
- If you want color, spray paint the wire and let it dry.
- Attach two nails or adhesive hooks to the wall at the appropriate distance.
- Hang the wire from the loops.
- Clip photos along the wire using mini clothespins. Space them evenly.
Pro Tip: Use the wire to display postcards from places you’ve traveled. The board itself becomes a conversation piece.
Advanced DIY Home Decor Projects
These five projects demand more time, some precision, and maybe a power tool. Take your time, follow the steps, and you’ll end up with a piece that looks professionally made.
16. Concrete Candle Holder
Skill Level: Advanced
Estimated Time: 1 hour (plus 24-hour curing)
Estimated Cost: $50–$100
Materials:
- Rapid-set cement (Quikrete or a similar small 1-kg bag)
- Water
- Old plastic container for mixing
- Two plastic cups (one larger than the other) to act as molds
- Cooking oil or petroleum jelly as a release agent
- Sandpaper (100 and 220 grit)
- Gloves and dust mask
- Tea light candle
Steps:
- Coat the inside of the larger cup and the outside of the smaller cup with oil.
- Mix a small amount of cement with water until it reaches a thick, oatmeal-like consistency.
- Pour about 1.5 inches of cement into the large cup.
- Press the smaller cup centered into the wet cement. Tape it in place so it doesn’t float up.
- Tap the sides gently to release air bubbles. Let it cure for at least 24 hours.
- Demold by cutting away the outer cup and twisting out the inner one.
- Wet-sand the rough edges starting with 100-grit, then 220-grit, until smooth. Rinse and let it dry. Place a tea light inside.
Pro Tip: Add a pinch of powdered pigment to the dry mix before adding water. A soft blush pink or charcoal gray makes the concrete look like designer stone.
17. Hand-Painted Tile Coasters
Skill Level: Advanced
Estimated Time: 2 hours (plus kiln-firing if using ceramic paint, or use air-dry paints)
Estimated Cost: $60–$100
Materials:
- Four plain ceramic tiles (inexpensive white ones, 4×4 inches)
- Ceramic paint pens or alcohol-based ink
- Clear acrylic spray sealer (if not kiln-firing)
- Rubbing alcohol and paper towels
- Cork backing sheet or felt pads
- Scissors and craft glue
Steps:
- Clean the tiles with rubbing alcohol and let them dry completely.
- Sketch a simple design: brushstroke lines, abstract marbling, or delicate florals.
- Use ceramic paint pens to draw directly on the tile. For an alcohol ink effect, drop ink onto the tile and tilt it to spread.
- Let the design dry for 1 hour.
- If not firing in a kiln, seal with three light coats of clear acrylic spray. Let each coat dry for 15 minutes.
- Cut small pieces of cork sheet and glue them to the bottom of each tile. Trim excess with a craft knife.
- Stack the coasters with a ribbon tie for a thoughtful gift.
Pro Tip: Before sealing, write the date or a small message on the back with a paint pen. It turns a simple coaster into a keepsake.
18. Large Macramé Wall Hanging
Skill Level: Advanced
Estimated Time: 4–5 hours
Estimated Cost: $80–$100
Materials:
- 5 mm cotton macramé cord, 80 meters
- A wooden dowel, 24 inches long
- Scissors
- Comb for fringe
- Measuring tape
Steps:
- Cut 16 cords, each 5 meters long. Attach them to the dowel using lark’s head knots. You’ll have 32 strands.
- Start with a row of square knots using groups of four strands, about 6 inches below the dowel.
- Vary the knot pattern: alternate square knots, add some half-hitch diagonal lines, and leave open spaces.
- Create a diamond or chevron center panel. Follow a pattern chart or freestyle — macramé is forgiving.
- About two-thirds of the way down, begin decreasing the width by tying knots that pull inward.
- End with a long fringe. Untwist the cord ends and brush them out with a comb for a soft, bohemian finish.
- Trim the fringe straight across, then hang the dowel with a separate cord attached at both ends.
Pro Tip: Hang it on a light-colored wall. The shadow play from the knots adds a second layer of texture you don’t have to make.
19. Floating Shelf from Reclaimed Wood
Skill Level: Advanced
Estimated Time: 3 hours
Estimated Cost: $50–$100 (if you find free wood pallets)
Materials:
- Reclaimed wood plank, about 18 inches long and 8 inches wide
- Two heavy-duty metal L-brackets (or make a hidden bracket from a long bolt and a block of wood)
- Sandpaper (80, 120, 220 grit)
- Wood stain or clear coat
- Drill and screws
- Wall anchors and level
- Rag
Steps:
- Sand the plank starting with 80-grit and working up to 220-grit until it’s smooth to the touch.
- Wipe off dust and apply wood stain with a rag. Wipe away the excess after 5 minutes. Let it dry.
- For a hidden floating effect, drill two holes into the back edge of the shelf, insert long bolts, and attach them to a mounting board screwed into the wall first.
- If that’s too complex, use decorative black L-brackets and mount them to studs.
- Hold the shelf against the wall, mark the bracket holes, drill, insert wall anchors, and screw the shelf in place.
- Check with a level before tightening fully.
- Style the shelf with a small plant and a framed photo.
Pro Tip: Rub a walnut (the nut itself, not oil) across any scratches in the wood. The natural oil fills and disguises the scratch almost magically.
20. Woven Rope Stool Makeover
Skill Level: Advanced
Estimated Time: 3–4 hours
Estimated Cost: $80–$100
Materials:
- Old wooden stool with a flat top (or a small crate)
- 8 mm cotton rope (30 meters, based on stool size)
- Hot glue gun and plenty of glue sticks
- Scissors
- Sandpaper
- Paint or stain for the legs (optional)
Steps:
- If the stool needs freshening, sand and paint the legs. Let them dry.
- Start in the very center of the seat. Apply a spiral of hot glue and press the rope down, coiling it outward.
- Keep the rope tight against the previous coil so no wood shows through.
- When you reach the edge, wrap the rope over the side and glue it underneath.
- Trim the rope on the underside and secure it with extra glue.
- Tuck in any stray fibers with the tip of the scissors.
- Place the stool beside a sofa or use it as a plant stand.
Pro Tip: Mix two colors of rope — a natural jute center and a dyed navy border. The color block effect makes an inexpensive stool look like a boutique find.
Conclusion
These 20 DIY home decor projects prove that personality doesn’t come from a price tag. It comes from the time you spend making something with your own hands — a coaster you painted, a shelf you mounted, a vase you gave new life. Every project here costs $100 or less, yet the impact on a room can be enormous.
Start with one easy project this weekend. Let that small victory pull you toward a bigger one. I’d love to see what you create — tag your photos with #ObviousLuxeDIY on social media, or drop a comment below and tell me which project you’ll try first.

