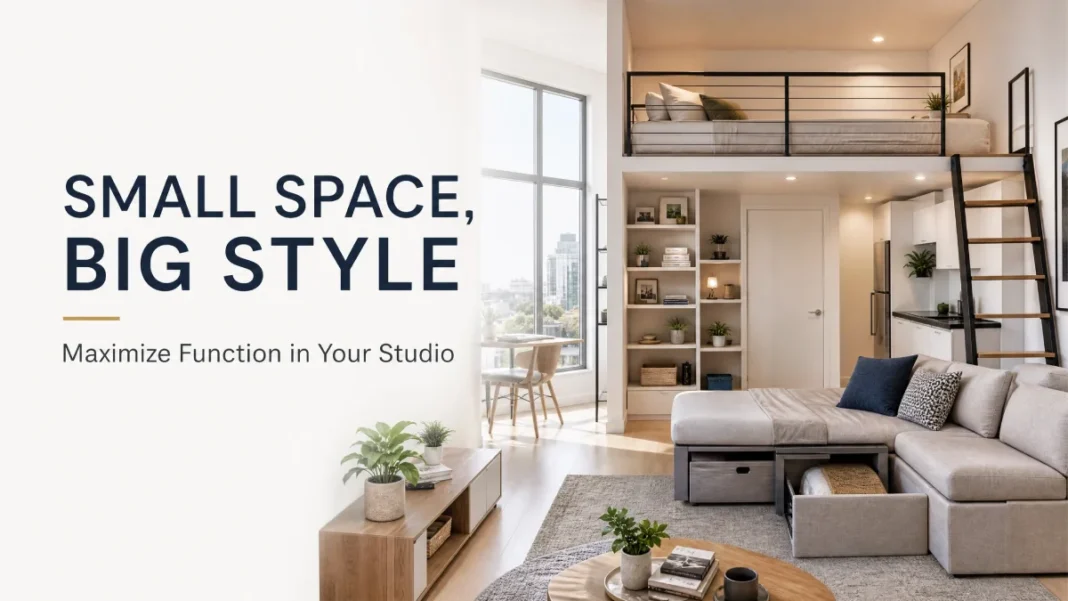
Living in a studio apartment often feels like a compromise. You want a home that looks pulled-together and feels calm, but one open room makes it hard to separate sleeping, eating, working, and relaxing. The good news: you don’t have to choose between beauty and practicality.
A small studio can be the coziest, most purposeful space you’ll ever live in. It just takes a smart plan — and I’ll walk you through it step by step.
Step 1: Start With a Zone Plan (Before You Buy a Single Thing)
When one room has to play four or five roles, zone planning is your secret weapon. Zone planning means mentally dividing your open floor plan into dedicated areas — a sleeping zone, a living zone, a work zone, and an eating/cooking zone. You don’t need walls; you need visual boundaries.
Grab a tape measure and a piece of paper. Sketch your studio’s footprint and mark the locations of windows, doors, radiators, and outlets. Then block out your non-negotiables. For most people, the bed takes priority. After that comes a spot to sit and unwind, a surface to eat or work, and some kind of storage.
Sleeping Area
Position your sleeping area as far from the kitchen and entry door as possible. In a standard 350-square-foot studio, for example, you might place the bed in a back corner near a window. The living zone sits in the middle, and a small dining or work surface fits between the living area and the kitchen. This flow creates a natural path through the space without bumping into furniture.
Define Zone Visually
A rug anchors the living area. A tall bookshelf placed perpendicular to the wall acts like a soft room divider between the bed and the sofa. Even something as simple as a floating shelf or a change in wall color can signal “this is a new zone.” For renters or anyone who wants a flexible layout, a curtain panel hung from a simple ceiling track can close off the sleeping area without any permanent construction. You’re not building walls — you’re creating visual cues that tell your brain where one function stops and another starts.
If you work from home, never float your desk in no man’s land. Tuck it into a corner or along a slim wall. Better yet, use a console table behind the sofa as a workspace. That leads us to the next non-negotiable: everything you bring into a studio must earn its square footage.
Step 2: Choose Multi-Functional Furniture That Works Twice as Hard
In a studio, single-purpose furniture is the enemy of function. Every piece needs to serve at least two roles. Multi-functional furniture does more than one job — a bed with storage drawers, a table that expands, an ottoman that hides blankets and doubles as a coffee table.
Start with your largest piece: the bed. A Murphy bed folds up into the wall and disappears during the day. If that’s not in the budget, a sofa bed or a daybed with a trundle gives you seating by day and sleep space by night. Look for a daybed with built-in drawers underneath — you instantly gain out-of-sight storage for extra linens or off-season clothes.
For seating, pick a small-scale sofa or a pair of comfortable chairs that you can pull around a coffee table. Skip the traditional coffee table and use a storage ottoman instead. You get a footrest, a place to set a tray with drinks, and a hidden bin for throws or tech gear. In a tiny space, that’s a triple win.
Drop-Leaf Table
Dining and working often collide in a studio. A drop-leaf table mounted to the wall folds down when you need to eat and tucks flat when you don’t. If you have a kitchen peninsula, add two backless stools that slide completely underneath — no visual clutter. For a dedicated desk, consider a wall-mounted floating desk that takes up zero floor footprint. When the workday ends, close your laptop, and the whole thing practically vanishes.
Here’s a quick-reference table of multi-functional heroes worth your money:
| Furniture Type | Dual Function | Best For | Real-World Example |
|---|---|---|---|
| Storage daybed | Sleep + seating + storage | Sleeping & living zones | IKEA BRIMNES daybed with 2 large drawers |
| Murphy desk bed | Bed folds up, desk folds down | Studio office-bedroom combo | Lori Wall Bed with fold-down desk |
| Storage ottoman | Footrest + coffee table + hidden storage | Living zone anchor | West Elm Mercury Row Storage Ottoman |
| Expandable dining table | Compact console to 4-person table | Eating & work area | IKEA NORDEN gateleg table |
| Nesting coffee tables | Separate side tables or one large surface | Flexible living layout | CB2 Peekaboo Acrylic Nesting Tables |
Stick to a cohesive material palette. If your big pieces are light wood and white, everything feels intentional. One mismatched dark brown piece can shrink the room visually.
Step 3: Go Vertical With Smart Storage (Don’t Waste an Inch of Wall)
Floor space is precious. Wall space is abundant and often totally ignored. Vertical storage means using your walls from floor to ceiling for shelves, hooks, and cabinets — pulling the eye up and keeping surfaces clear.
Floating Shelves
Install floating shelves above doorways, above the sofa, and in the kitchen. Use them to store books, display a few chosen objects, and keep daily essentials off the counter. In the kitchen, a magnetic knife strip on the backsplash and a ceiling-mounted pot rack free up drawers and cabinets instantly. Over-the-door organizers aren’t just for college dorms — a slim one on the bathroom door can hold toiletries, cleaning supplies, or shoes.
Blank Wall
Look at that blank wall behind your sofa. That’s a perfect spot for a tall, narrow bookcase — think the IKEA BILLY system or a ladder shelf. Keep it shallow (under 12 inches deep) so it doesn’t eat into walking space. Arrange books horizontally and vertically, add one small plant, and leave some open space on each shelf. The goal is function without visual weight.
Your closet likely holds more than you think. Maximize it with a hanging shelf system, slim velvet hangers, and shelf dividers. Store out-of-season clothes in vacuum-sealed bags under the bed or inside the storage ottoman. The rule: if it doesn’t have a home behind a closed door or inside a labeled bin, it becomes visual noise. In a studio, visual noise equals “messy and cramped.”
Even your entryway area — often just a patch of wall near the door — can work harder. A wall-mounted coat rack with a small shelf and a key hook corrals everything you drop when you walk in. Add a slim shoe cabinet that’s only 10 inches deep. Suddenly, shoes aren’t scattered across your living room floor.
Step 4: Use Visual Expansion Tricks to Double Your Perceived Space
Function matters, but how the space feels is just as important. A few visual expansion tricks fool the eye into reading the room as larger and airier than the square footage suggests.
Color is your most powerful tool. Paint your walls and ceiling the same soft, light color to blur the boundaries where walls meet ceiling. Benjamin Moore’s White Dove OC-17 is a warm, foolproof white that flatters both natural and artificial light. It doesn’t read stark or cold — just serene. If you crave color, use it on a single accent wall or through bedding and pillows that you can swap seasonally.
Renters can get the same effect with peel-and-stick wallpaper — brands like Tempaper and Chasing Paper offer removable options that won’t damage the surface underneath.
Mirrors
Mirrors are non-negotiable. Place a large, floor-to-ceiling mirror opposite a window. It reflects light and creates the illusion of another room beyond the glass. Even a leaning mirror propped against the wall beside your bed does the trick. Grouping three smaller mirrors in a row on one wall also stretches the space horizontally.
Transparent materials keep the line of sight open. An acrylic or glass coffee table, ghost chairs, and a lucite console visually disappear. The CB2 Peekaboo acrylic nesting tables from the table above, for instance, hold your drink without adding any visual heaviness. Use a clear acrylic desk chair and your work zone will look like it barely exists.
Lights
Lighting needs layers. A single overhead fixture casts harsh shadows and makes the room feel small. Instead, use at least three light sources at different heights: a floor lamp next to the sofa, a small table lamp on a shelf, and under-cabinet lighting in the kitchen. Wall sconces free up floor and surface space while adding a warm glow. Choose bulbs in the 2700K–3000K range — soft white light that feels like evening sunshine. Smart bulbs like Philips Hue or LIFX let you shift from bright task lighting during the day to warm ambient light at night without swapping fixtures.
Finally, mind the gaps between furniture and the walls. Pull your sofa a couple of inches away from the wall. Leave air around each piece. It sounds counterintuitive, but a little breathing room makes the layout feel intentional and less cluttered than shoving everything against the perimeter.
Step 5: Style It Like a Pro (The Finishing Touches That Make It Luxe)
Now that the bones are in place, it’s time to layer in personality. Small studios reward a curated, less-is-more approach. You want your space to feel collected, not cluttered.
Stick to a cohesive color story of 3–5 tones. For example, white walls + warm wood + olive green + brushed brass accents. Repeat those tones in your pillows, a throw blanket, a vase, and a piece of wall art. When the eye travels around the room and sees the same colors repeated, the whole studio reads as one harmonious space rather than a jumble of zones.
Scale Art up, Not Down
One large piece above the sofa makes the ceiling feel higher, and the room feel grander than a cluster of small frames. Choose a print or canvas at least 24×36 inches. Lean it on a shelf or hang it with the center at eye level (about 57–60 inches from the floor).
Bring in life with a real plant or two. A tall fiddle leaf fig in a woven basket draws the eye up and softens hard corners. If your floor space is maxed out, mount a small wall planter or place a pothos on a high shelf and let it trail down. Living greenery adds texture and warmth.
One Pro Move
Dress your windows simply. Heavy drapes swallow light and square footage. Use sheer linen curtains that go from ceiling to floor, mounted as close to the ceiling as possible. They soften the light and make the window wall feel taller. If privacy isn’t a concern, skip curtains altogether and let the windows frame the view.
Real Studio Examples With Dimensions
Sometimes seeing how someone else solved the puzzle makes everything click. Here are two studio layouts I’ve designed for clients that follow every principle above.
The 320-Square-Foot Rectangle (Chicago)
- Sleeping zone: Full-size Murphy bed on the short wall near the window, flanked by two floating shelves as nightstands.
- Living zone: A 68-inch sofa set 18 inches from the wall, anchored by a 5×7-foot jute rug. A glass-topped storage ottoman serves as the coffee table.
- Work zone: A wall-mounted floating desk on the long wall behind the sofa, paired with an acrylic ghost chair. Above it, a 30-inch round mirror reflects light from the window across the room.
- Dining zone: A round pedestal table (30-inch diameter) tucked into the kitchen corner with two stools that slide beneath.
- Storage: A 72-inch tall, 12-inch deep bookcase beside the bed creates a soft room divider between sleeping and living areas. Head-to-toe curtain panels close off the closet area when not in use.
The 400-Square-Foot Square Studio (Brooklyn)
- Sleeping zone: Queen-size storage bed with six deep drawers placed against the back wall, away from the kitchen. A slim console table behind the headboard acts as a room divider and a surface for a lamp and books.
- Living zone: A small-scale apartment sofa in a light performance fabric faces a wall of floating shelves that hold a TV, books, and decorative objects. A 4×6-foot rug grounds the area, and a leaning mirror in the corner amplifies natural light.
- Work zone: A drop-leaf desk mounted next to the window folds completely flat after work hours.
- Dining: A built-in breakfast bar extension off the kitchen counter with two counter stools.
- Visual expansion: The entire apartment, including the ceiling, is painted in Benjamin Moore White Dove OC-17. Sheer white curtains hang floor to ceiling. Acrylic side tables and a lucite floor lamp keep sightlines open.
These aren’t hypotheticals — they’re layouts built around real constraints and real budgets. Notice that in both, nothing is purely decorative. Every piece works, and every zone feels distinct without a single wall.
Conclusion
A small studio apartment doesn’t have to feel like a limitation. When you lead with a zone plan, choose furniture that works twice as hard, take storage all the way up the walls, and apply a few clever visual tricks, you create a home that’s equal parts functional and beautiful.
The real secret? Be intentional about what you let in. In 350 square feet, every object either adds ease and joy or it adds noise. You get to choose.
Now measure your space, pick one zone to tackle this weekend, and start with the item that will make the biggest difference — maybe that leaning mirror, maybe those floating shelves. Then come back and tell me how it went. I’d love to hear what you transformed first.

