You’re standing in an empty room, staring at four bare walls. Maybe you just closed on a 1980s colonial that needs a full refresh. Maybe you’re finally tired of that rental-grade beige. Whatever brought you here, you now face the same question every homeowner eventually asks: What do I actually put on these walls?
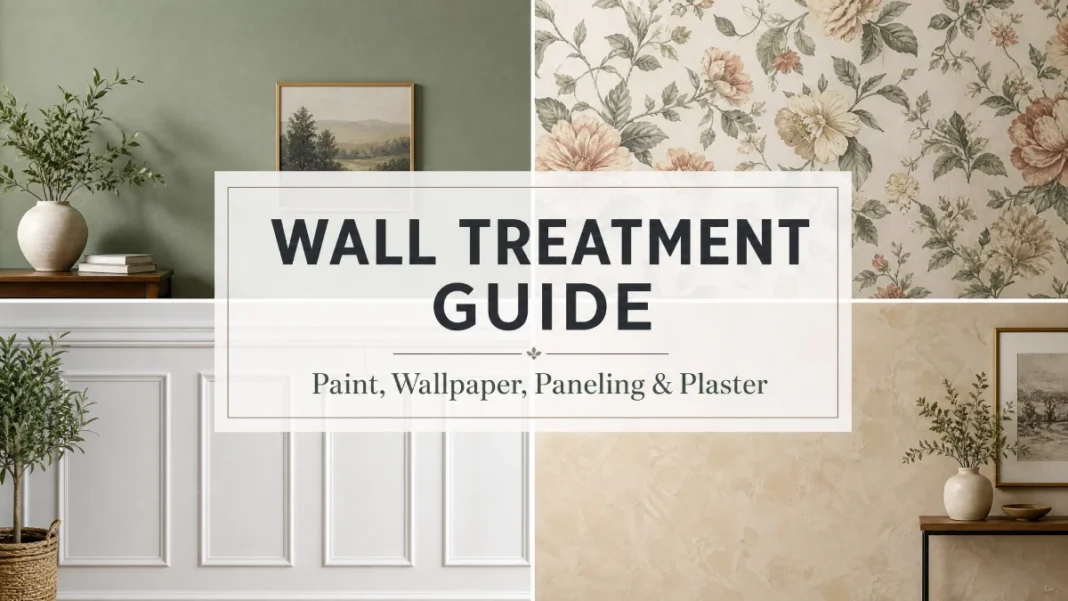
The answer isn’t as simple as picking a color. Paint, wallpaper, paneling, and plaster each bring a different energy to a space. They differ wildly in cost, in how they feel under your fingertips, and in whether you can pull them off on a Saturday afternoon or need to write a check to a pro. This guide walks you through all four wall treatment options — compared head-to-head — so you can choose with confidence.
By the time you finish reading, you’ll know exactly which treatment suits your room, your budget, and your tolerance for DIY chaos. You’ll also get a decision framework that answers the question: “If my room is X, which treatment should I choose?”
Understanding Your Wall Treatment Options
Before comparing, here’s what each term actually means. Each wall treatment comes with its own vocabulary, and you’ll hear terms thrown around at hardware stores and design studios.
What Is Paint?
Paint is a liquid coating applied to walls that dries into a solid, colored film. It’s the most common wall treatment in American homes. Modern latex paints are low-odor, fast-drying, and available in thousands of colors.
When you walk into a paint store, you’ll choose between finishes:
- Flat/Matte: Zero shine, hides wall imperfections beautifully, but scuffs if you look at it wrong. Best for low-traffic rooms and ceilings.
- Eggshell: A whisper of sheen. It’s the workhorse finish for living rooms, dining rooms, and adult bedrooms.
- Satin: Noticeable sheen, scrubbable. Ideal for kitchens, bathrooms, kids’ rooms, and hallways.
- Semi-Gloss and Gloss: High shine, extremely durable, shows every wall flaw. Reserve these for trim, doors, and cabinets.
What Is Wallpaper?
Wallpaper is decorative paper or vinyl material adhered to walls using paste. Today’s wallpaper is nothing like the brittle, impossible-to-remove stuff from your grandmother’s kitchen. Modern options include:
- Peel-and-stick: Vinyl-based, removable, no paste required. A renter’s dream and a commitment-phobe’s best friend.
- Traditional unpasted: You apply adhesive to the back. More permanent, more professional-looking, more work.
- Pre-pasted: Adhesive is already on the back. You activate it with water. Think of it as the middle ground.
Wallpaper comes in patterns ranging from subtle grasscloth textures to bold, large-scale florals and geometrics.
What Is Paneling?
Paneling refers to decorative wood or wood-look boards applied to walls. This category is broad, and you’ve definitely seen several types without knowing their names.
- Wainscoting: Decorative wood paneling that covers the lower third or half of a wall, topped with a chair rail. Traditional and instantly architectural. Common in dining rooms and entryways.
- Shiplap: Horizontal boards with a small gap (called a “nickel gap”) between each plank. Made famous by modern farmhouse design, shiplap adds texture and linear movement.
- Board and Batten: Vertical boards with narrower strips (battens) covering the seams. This creates a grid-like, structured look that feels both rustic and tailored.
- Beadboard: Narrow vertical planks with a small indentation (the “bead”) between each board. Classic cottage and coastal style, often used on ceilings too.
What Is Plaster?
Plaster is a paste-like material made from lime, gypsum, or cement that’s troweled onto walls and hardens into a smooth or textured surface. It’s an ancient technique that’s seen a major resurgence in high-end design.
- Venetian plaster: A multi-layered lime plaster technique that creates a polished, marble-like surface with depth and subtle movement. It looks like stone but feels like silk.
- Limewash: A thin, chalky paint-like finish that creates a soft, mottled, old-world effect. It’s breathable, naturally antibacterial, and practically made for Mediterranean and minimalist interiors.
- Skip trowel and knockdown: Textured plaster finishes popular in Spanish Colonial and Southwestern homes. They add dimension and hide drywall imperfections.
Wall Treatment Options Compared: The Full Breakdown
Now for the detailed comparison. I’m evaluating each treatment against the same criteria so you can make an apples-to-apples decision.
Paint
Application Process
Painting a room sounds simple, and fundamentally it is. But the difference between a professional-looking paint job and one that screams “I did this myself” comes down to prep work.
You’ll need to: clear the room, protect floors with drop cloths, and remove outlet covers. Then tape edges with painter’s tape, fill holes and cracks with spackle, sand smooth, and prime — Zinsser and KILZ are trusted options — especially if you’re making a drastic color change. Finally, apply two coats of paint with a roller and brush. Each coat needs 2 to 4 hours to dry before recoating.
The single biggest mistake I see? Skipping primer on fresh drywall or when going from dark to light. You’ll end up doing three coats instead of two, which costs more money and time than primer ever would have.
Cost Per Square Foot
- DIY: $0.60 to $1.80 per sq ft for quality paint and basic supplies.
- Professional: $2.00 to $4.50 per sq ft including labor and materials.
A standard 12′ x 12′ room with 8-foot ceilings has roughly 400 square feet of wall space. DIY cost: approximately $240 to $720. Professional: approximately $800 to $1,800.
Brands like Benjamin Moore and Sherwin-Williams typically run $60 to $80 per gallon. Behr is a reliable alternative at $30 to $45 per gallon. One gallon covers about 350 to 400 square feet. Don’t buy the cheapest paint on the shelf — you’ll do more coats, and the finish will never look quite right. My go-to for walls is Benjamin Moore Regal Select in Eggshell (roughly $68/gallon).
Durability
A wall painted with quality paint lasts 5 to 10 years before it needs refreshing. High-traffic areas like hallways and kids’ rooms may show wear sooner — scuffs, marks, and faded patches near light switches. Flat finishes are the least durable. Satin and semi-gloss can handle scrubbing.
Maintenance
Maintenance is straightforward: wipe with a damp microfiber cloth for most finishes. Flat paint doesn’t wipe clean easily, so expect to touch up instead. Keep leftover paint in a labeled jar for spot fixes. One quart of touch-up paint can extend the life of your walls by years.
Best Room Applications
Paint works in every room in your house. It’s the default choice for living rooms, bedrooms, and home offices. Use satin or semi-gloss in kitchens, bathrooms, and laundry rooms where moisture and mess are daily realities. If indoor air quality is a priority — in nurseries or bedrooms, for example — choose a zero-VOC formula. VOCs (volatile organic compounds) release gases as paint dries that can cause headaches and respiratory irritation. Most major brands now offer zero-VOC options.
Trending Paint Styles
Color-drenching — painting walls, ceiling, trim, and even doors in a single color — is having its moment. It creates a cocooning, intentional feel that reads as far more expensive than it is. Deep, moody hues like Benjamin Moore’s Wrought Iron or soft warm neutrals like Farrow & Ball’s Jitney are everywhere right now.
DIY-Ability vs. Professional Need
DIY score: 9 out of 10. Painting is the most DIY-friendly wall treatment by a wide margin. You need patience, good tools (don’t cheap out on brushes — Purdy and Wooster are worth every cent), and the willingness to prep properly. Hire a pro if you have 20-foot ceilings, extensive crown molding, or a tight deadline.
Wallpaper
Application Process
Wallpaper installation varies by type. Peel-and-stick is the simplest: peel the backing, position on the wall, and smooth out bubbles with a squeegee. Traditional unpasted wallpaper involves measuring, cutting, applying paste, booking (folding the paper paste-side-in to let it activate), and carefully hanging each strip.
The most critical step is layout planning. You need to center the pattern on your focal wall and account for pattern repeats — the distance between where the pattern starts and where it starts again. If you don’t match the repeat, your seams will look like a jigsaw puzzle assembled by someone who gave up.
Cost Per Square Foot
- Peel-and-stick: $1.50 to $4.00 per sq ft for the material.
- Traditional wallpaper: $2.00 to $8.00 per sq ft for material. High-end designer papers from brands like Schumacher or Cole & Son can push to $12 to $15 per sq ft.
- Professional installation: Adds $3.00 to $8.00 per sq ft.
A single accent wall (roughly 100 sq ft) in a mid-range traditional paper will run $200 to $500 for DIY, or $500 to $1,100 with installation. Papering a full 12′ x 12′ room? Budget $800 to $2,500 for materials alone.
Durability
Modern vinyl wallpapers are surprisingly tough and can last 10 to 15 years or longer. Traditional paper wallpapers are more delicate and prone to fading, tearing, and staining. Kitchens and bathrooms require vinyl or specifically rated moisture-resistant papers — standard paper will peel from steam and humidity.
Maintenance
Vinyl wallpaper wipes clean with a damp sponge. Paper wallpapers are largely hands-off — dust gently with a microfiber cloth. Peel-and-stick may lift at the seams over time, especially in humid environments. You can re-stick them with a dab of adhesive, but it’s a recurring annoyance.
Best Room Applications
Wallpaper shines in spaces where you want instant personality: powder rooms, dining rooms, accent walls in primary bedrooms, and entryways. Powder rooms are the best place to go bold — it’s a small, enclosed space where guests spend two minutes and you can take design risks without overwhelming daily life.
Avoid wallpaper in full bathrooms with poor ventilation, laundry rooms, and any wall that gets direct, intense sunlight (unless the paper is specifically UV-resistant).
Trending Wallpaper Styles
Grasscloth — a natural, woven texture that brings organic warmth — remains the designer favorite. Large-scale botanicals, mural-style landscapes, and Art Deco geometrics are also everywhere in current high-end interiors. Peel-and-stick murals from brands like Tempaper have democratized statement walls for renters and the commitment-averse.
DIY-Ability vs. Professional Need
DIY score: 5 out of 10. Peel-and-stick is DIY-friendly and forgiving. Traditional wallpaper requires skill, especially around corners, outlets, and windows. If you’re papering a full room with a pattern that requires precise matching, hire a professional. The cost of removing a bad DIY wallpaper job (think: gouged drywall and visible seams) far exceeds the installation fee.
Paneling
Application Process
Paneling installation varies by type but follows a general framework: measure your wall, plan your layout, cut boards to size, secure them to studs with a nail gun or construction adhesive, fill nail holes, caulk seams, and paint or stain.
Shiplap and beadboard are the most approachable for beginners. Both use tongue-and-groove boards that slot together. Wainscoting and board-and-batten require more precise measuring, mitered cuts, and a clear understanding of proportions — you’re essentially building a custom architectural grid onto your wall.
For all paneling types, the biggest hidden step is dealing with outlets and switches. You’ll need to either move electrical boxes forward (so they sit flush with the new paneling surface) or use outlet spacers. Forgetting this step leaves you with recessed outlets buried a half-inch into the wall.
Cost Per Square Foot
- Shiplap boards: $2.50 to $6.00 per sq ft for real wood. MDF shiplap sheets run $1.50 to $3.00 per sq ft.
- Beadboard panels: $1.50 to $3.00 per sq ft for MDF sheets.
- Wainscoting kits: $4.00 to $10.00 per sq ft.
- Board and batten: $2.00 to $5.00 per sq ft for materials.
- Professional installation: Adds $5.00 to $12.00 per sq ft depending on complexity.
A DIY shiplap accent wall in a standard room might cost $350 to $800. A professionally installed wainscoting package in a formal dining room? Easily $2,000 to $4,000.
Durability
Paneling is the most durable wall treatment in this comparison. Solid wood paneling can last decades — potentially the life of your home — with minimal care. It also dampens sound noticeably, making it a practical choice for shared walls and media rooms. MDF options are less durable than real wood but still more impact-resistant than painted drywall. Paneling in high-moisture areas needs proper sealing; untreated MDF will swell and bubble if it gets wet.
Maintenance
Dust paneling regularly with a microfiber cloth or vacuum brush attachment. Painted paneling can be wiped clean. The nickel gaps in shiplap collect dust and require periodic attention — a vacuum with a crevice tool makes quick work of this. Repainting paneling is a massive project due to all the edges, grooves, and corners.
Best Room Applications
Wainscoting belongs in dining rooms, entryways, and hallways — anywhere you want to add architectural gravitas. Shiplap works beautifully in living rooms, primary bedrooms, and home offices. Beadboard is designed for bathrooms, mudrooms, and cottage-style kitchens. Board and batten adds striking curb appeal and brings verticality to rooms with low ceilings.
Trending Paneling Styles
Shiplap has evolved beyond the all-white farmhouse look. Designers are now installing it vertically (rather than horizontally) or painting it in saturated, unexpected colors like deep navy or charcoal. Slim-profile board and batten — with narrower, more refined battens — reads as modern and tailored rather than rustic. Fluted wood panels and reclaimed wood accent walls are also gaining traction, adding texture and a mid-century warmth.
DIY-Ability vs. Professional Need
DIY score: 6 out of 10 for shiplap and beadboard; 3 out of 10 for wainscoting and board-and-batten. A feature wall of shiplap is an achievable weekend project for a confident DIYer with a miter saw. Wainscoting involves complex math, precise cuts, and an aesthetic eye for proportion. If your vision includes custom wainscoting in a dining room, call a finish carpenter.
Plaster
Application Process
Plaster application is physically demanding and skill-intensive. Venetian plaster involves applying multiple thin layers of lime plaster with a trowel, then burnishing (polishing) the final coat to achieve that signature sheen. Each layer must cure before the next goes on. Limewash is more forgiving — you apply it with a large brush in loose, overlapping strokes, similar to painting but with more deliberate marks.
Neither material behaves like paint. You’re working with something alive — it absorbs, breathes, and changes as it cures. The result depends on technique, humidity, and the substrate beneath.
Cost Per Square Foot
- Venetian plaster materials: $3.00 to $8.00 per sq ft for high-grade lime plaster.
- Limewash materials: $1.50 to $3.00 per sq ft.
- Professional Venetian plaster application: $10.00 to $20.00 per sq ft. This is a highly specialized skill and commands specialist pricing.
- Professional limewash application: $5.00 to $10.00 per sq ft.
A Venetian plaster feature wall in a primary bedroom might cost $1,500 to $3,000 professionally. Limewashing a living room professionally? Budget $2,000 to $4,500 depending on square footage.
Durability
This is where plaster shines — literally and figuratively. Properly applied Venetian plaster can last decades, even centuries. It’s naturally resistant to mold and mildew due to its high pH, and it regulates indoor humidity by absorbing and releasing moisture. Limewash is similarly long-lasting but may need a refresh coat every 5 to 7 years in high-touch areas. Plaster won’t chip like paint and won’t peel like wallpaper. It ages gracefully, developing a patina that only improves over time.
Maintenance
Venetian plaster is low-maintenance. Dust it gently. Wipe with a barely damp cloth for marks. Avoid chemical cleaners — they can damage the burnished surface. Limewash can be spot-repaired relatively easily; you can reapply to patch areas without stripping the entire wall. Both finishes are breathable, meaning they regulate moisture naturally and don’t trap humidity behind them.
Best Room Applications
Plaster treatments work anywhere, but they shine in spaces where you want to create atmosphere: primary bedrooms, formal living rooms, dining rooms, and powder rooms. Venetian plaster on a range hood surround or behind a vanity creates an instant focal point. Limewash in a living room with natural linen curtains and worn wood floors? Absolutely magical.
Plaster finishes need proper substrate preparation. They don’t adhere well to poorly prepared drywall. If your walls have significant cracks or structural movement, address those issues first — plaster will crack if the wall behind it shifts.
Trending Plaster Styles
Polished Venetian plaster in warm, earthy tones — think burnished clay, warm sand, soft taupe — is everywhere in high-end interiors. Roman clay (a modern, user-friendly alternative to traditional Venetian plaster) has made the look more accessible to DIYers. Microcement — a thin, durable cement-based coating — is gaining traction for bathrooms and kitchen surfaces, offering a seamless, industrial-chic finish. Limewash in chalky whites, soft grays, and muted sage greens captures the quiet luxury movement that’s shaped design for the past few years.
DIY-Ability vs. Professional Need
DIY score: 2 out of 10 for Venetian plaster; 5 out of 10 for limewash. Venetian plaster is genuinely difficult. The trowel technique takes practice, and mistakes are hard to hide. Roman clay products from brands like Portola Paints and limewash from Romabio have lowered the barrier slightly, but you’re still working with a skill-dependent material. Limewash is far more forgiving and achievable for a motivated DIYer. Watch tutorial videos, practice on a sample board, and don’t expect perfection on your first wall.
All Four Wall Treatments at a Glance
| Feature | Paint | Wallpaper | Paneling | Plaster |
|---|---|---|---|---|
| DIY Cost (per sq ft) | $0.60 – $1.80 | $1.50 – $8.00 | $1.50 – $6.00 | $1.50 – $8.00 |
| Professional Cost (per sq ft) | $2.00 – $4.50 | $5.00 – $23.00 | $6.50 – $17.00 | $10.00 – $20.00 |
| Typical Lifespan | 5 – 10 years | 10 – 15 years | 20+ years | 20+ years (often lifetime) |
| DIY Difficulty (1–10) | 9 (easy) | 5 (moderate) | 3–6 (varies by type) | 2–5 (varies by type) |
| Moisture Resistance | High (with satin/gloss) | Moderate (vinyl only) | Moderate (sealed only) | High (naturally breathable) |
| Best Rooms | Every room | Powder rooms, accent walls, dining | Dining, entry, bathrooms, living | Living, primary bedroom, dining |
| Removal Difficulty | Low (paint over) | Moderate to high | High | Very high (or permanent) |
Decision Framework: If Your Room Is X, Choose Y
This is the section that will save you from analysis paralysis. Match your situation to the recommendation.
Wallpaper
If your room is a powder room or small accent wall and you want maximum personality with one design move: Choose wallpaper. Small spaces can handle bold pattern without overwhelming. The cost stays manageable because the square footage is limited.
Paint in a satin or semi-gloss finish
If your room is a kitchen or full bathroom with moisture, steam, and splashes: Choose paint in a satin or semi-gloss finish. It handles humidity best, cleans up easily, and doesn’t give you peeling seams or trapped moisture. For kitchens with open shelving, consider adding beadboard as a backsplash alternative for texture.
Wainscoting
If your room is a formal dining room where you want architectural presence and a sense of occasion: Choose wainscoting. It adds instant history and weight to the room. Paint the upper wall and wainscoting in the same color but different finishes — eggshell above, semi-gloss below — for subtle, sophisticated contrast.
Limewash or Venetian plaster
If your room is a primary bedroom where you want serenity, texture, and a quiet, high-end feel: Choose limewash or Venetian plaster. These finishes catch light differently as the day changes. They feel alive in a way painted walls never will. If the full plaster investment exceeds your budget, try limewash on just the wall behind your bed.
Vertical shiplap or board and batten
If your room is a living room with 8-foot ceilings that feel low and you want to add visual height: Choose vertical shiplap or board and batten. The vertical lines draw the eye upward and make the ceiling feel taller. Paint it the same color as the ceiling to amplify the effect.
Paint in a warm, medium-toned color
If your room is a home office that doubles as a Zoom background and you need it to look polished without being distracting: Choose paint in a warm, medium-toned color — nothing too dark (which reads as a cave on camera) and nothing stark white (which blows out the exposure). Benjamin Moore’s Pale Oak OC-20 is my go-to recommendation for on-camera walls.
Peel-and-stick wallpaper
If your room is a rental apartment where you can’t make permanent changes: Choose peel-and-stick wallpaper on an accent wall. It removes cleanly at move-out and transforms a generic white box into a space that feels like yours. No lost security deposits.
Paint
If your budget is under $500 for a standard room and you’re doing the work yourself: Choose paint. It gives you the most dramatic transformation per dollar. Invest in good tools and take the prep seriously — the result will look like a much more expensive upgrade.
Two Rooms, Two Different Choices
A client of mine recently renovated a 1920s bungalow. For the formal dining room, we used wainscoting painted in Benjamin Moore’s Simply White OC-117 in semi-gloss, with the upper walls in a soft sage wallpaper. The room had zero architectural character before. Afterward, it looked like it had been there for 100 years — in the best way.
For their primary bedroom, we went with limewash in a chalky warm beige. The client wanted the room to feel like a retreat. Limewash delivered that soft, imperfect, cloud-like texture that paint just can’t replicate. The entire bedroom project came in around $2,800, including professional application. Not cheap, but it transformed the room into the most talked-about space in the house.
Common Mistakes
Before you start, know what trips people up most.
Skipping sample testing
Never commit to a paint color, wallpaper pattern, or plaster finish without seeing it in your actual room with your actual lighting. Paint samples on 12″ x 12″ boards. Order wallpaper swatches. Do a plaster sample board. The color that looked perfect on your phone screen will look completely different on your east-facing wall at 8 a.m.
Underestimating prep work
Every wall treatment requires wall preparation. Painting over greasy kitchen walls without cleaning and priming? The paint won’t adhere. Applying wallpaper over textured walls? Heavy textures like orange peel or knockdown will telegraph through and prevent clean adhesion. Installing paneling on uneven walls? Gaps and crooked lines everywhere.
Choosing form over function
That matte finish paint looks beautiful in the powder room — until someone with damp hands touches the wall. That delicate paper wallpaper is stunning in the bathroom — until the steam from 50 showers peels it at the seams. Pick the treatment that fits how you actually live, not just how you want your photos to look.
Conclusion
The right wall treatment changes everything about how a room feels. Paint gives you the most flexibility for the least money. Wallpaper delivers personality in one bold move. Paneling adds architectural weight and permanence. Plaster creates depth and atmosphere that no other finish can match.
The most important takeaway is this: the best wall treatment is the one that fits your room’s function, your lifestyle, and your budget — all three at once, not just one.
Your next step? Order samples. Right now. Paint swatches, wallpaper cuttings, limewash test pots. Put them on your wall. Live with them for three days in different light. Your walls are the largest surface area in your home — they deserve a decision you’ve actually looked at, not one you made from a phone screen at midnight.

