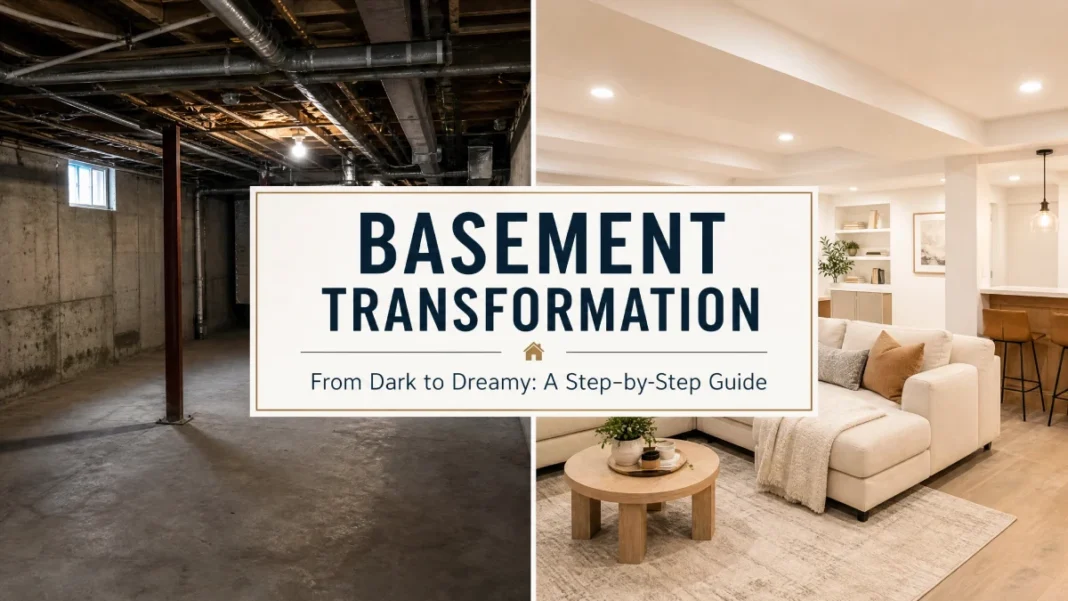
You walk down the stairs and the smell of damp concrete greets you. A single bare bulb throws long shadows across a sea of storage bins. That below-grade square footage could be a cozy guest suite, a home theater, or the gym you’d actually use — but right now it’s just wasted potential.
Turning a basement from dark to dreamy isn’t a weekend paint job. It’s a sequence of deliberate steps that starts long before you pick a sofa. If you skip the practical — moisture management, egress, insulation — you’ll end up with a beautiful space that feels like a cave or, worse, grows mold behind your new drywall.
Here’s how to do it step by step — assessing what you have, locking down moisture, layering light, and choosing a layout that works for real life.
Step 1: Start With a Thorough Basement Assessment
Before you frame one wall, stand in the center of your basement and take honest notes. This is not the time for optimism goggles. You’re looking for three things: water, headroom, and mechanicals.
Check for Water Intrusion
Look at the walls and floors after a heavy rain. Do you see damp patches, white powdery deposits (efflorescence), or peeling paint? Touch the concrete in a few spots. If your hand comes back damp, you have moisture moving through the foundation.
Walk the perimeter and inspect the rim joist — the wood sill on top of the foundation wall. Probe it with a screwdriver. Soft or crumbly wood signals past or ongoing water damage. Also check for a musty smell; it’s often the first sign of hidden mold.
While you’re assessing, test for radon. This odorless, radioactive gas seeps up through foundation cracks and is the second leading cause of lung cancer in the U.S., according to the EPA. A short-term test kit runs about $15 at any hardware store. If levels exceed 4 pCi/L, a professional mitigation system costs $800 to $1,500 — far less than retrofitting one after the space is finished.
Measure Headroom and Floor Condition
Most building codes require at least 7 feet of finished ceiling height for habitable rooms. Take a laser measure and check the lowest point — usually under ducts or beams. If you have less than 7 feet, you’ll need creative ceiling strategies like painting joists black or installing a shallow drywall ceiling with slim LED lights. You’ll still want at least 6 feet 8 inches for comfort.
Examine the floor slab. Major cracks wider than a quarter inch or vertical displacement could indicate structural movement. Hairline cracks are common, but if they look fresh or you have a heaving slab, consult a structural engineer before you invest a dime.
Map Your Mechanicals
Identify the furnace, water heater, electrical panel, and any plumbing stacks. You’ll need code-mandated clearance around them — typically 30 inches wide and 30 inches deep for panels and at least 3 feet of access for most HVAC equipment. These areas become natural boundaries for your floor plan.
Step 2: Master Moisture and Waterproofing First
Nothing ruins a basement finish faster than water. No paint, no flooring, no decor can compensate for a damp slab. This step is non-negotiable.
Solve Moisture From the Outside In
Start outside. Walk around your house and check that the grading slopes away from the foundation at a rate of at least 6 inches over the first 10 feet. Extend downspout discharge at least 4 to 6 feet from the house. Clogged gutters are a common culprit — clean them twice a year.
If water still seeps through the walls, you may need exterior waterproofing, which involves excavating to the footing, applying a waterproof membrane, and installing a drainage board. It’s expensive — often $8,000 to $15,000 — but it fixes the problem at the source.
Interior Water Management
For many homes, an interior system makes more financial sense. An interior drain tile (a perforated pipe along the inside perimeter) captures water that enters at the cove joint — where the wall meets the floor — and channels it to a sump pump. This system, paired with a vapor barrier on the walls, can keep a basement dry enough to finish. Budget around $3,000 to $7,000 for a professional installation, depending on perimeter length.
Even a dry basement benefits from a high-capacity dehumidifier set to maintain 45–50% relative humidity. I like the Aprilaire E070 or a standalone Frigidaire model with a pump for hands-off operation. Run a dedicated drain line to a floor sink if you can.
Surface Prep and Products
Once bulk water is controlled, seal the walls and floor. Use a penetrating silicate sealer (like Ghostshield Lithi-Tek 9500) on interior concrete walls to reduce vapor transmission. If you have minor moisture vapor but no liquid water, you can apply a mold-resistant waterproofing paint, such as DRYLOK Extreme. But remember — these paints are vapor barriers, not crack-fixers. They won’t hold back active leaks.
Quick Moisture Checklist Before Framing
- Grading and downspouts extended
- No visible damp spots after 48 hours of rain
- Relative humidity stable at 50% or below
- Cracks sealed with hydraulic cement or epoxy injection
- Sump pump tested and, ideally, a battery backup installed
Step 3: Insulate for Comfort and Code
Basement insulation keeps the space warm, prevents condensation, and meets energy codes. Below-grade walls need a different approach than above-grade walls.
Wall Insulation: Continuous Insulation Is Key
Do not put fiberglass batts directly against a concrete wall. The temperature differential will cause condensation inside the cavity, and fiberglass wicks moisture like a sponge. Instead, use rigid foam as a continuous insulation layer against the concrete. Two popular options:
- Extruded Polystyrene (XPS) — R-5 per inch, higher water resistance.
- Expanded Polystyrene (EPS) — R-4 per inch, slightly more vapor-permeable, often more budget-friendly.
For most climates in the U.S., aim for R-10 to R-15 on basement walls. That means 2 inches of XPS or 2.5 inches of EPS. Seal all seams with foil tape or compatible adhesive. This foam layer also acts as your vapor barrier — a continuous barrier that stops moisture from moving from the warm interior to the cold wall.
After the rigid foam, you can frame a 2×4 wall right against it. Fill the stud cavities with unfaced fiberglass or mineral wool — Rockwool Safe’n’Sound is a popular choice — for added R-value and sound dampening. Mineral wool outperforms fiberglass at blocking noise, which matters if a laundry room or mechanical closet shares a wall with your new living space. No internal vapor barrier is needed if you already have the exterior foam.
Floor Insulation: Keep Your Feet Warm
Concrete sucks heat out fast. A subfloor system creates a thermal break and a flat, clean surface for finish flooring. Two approaches work well:
- Dimpled membrane panels like DMX 1-Step. Lay them directly on the slab, then top with OSB or plywood. They allow air circulation and let any minor moisture vapor escape.
- Insulated subfloor panels like Dricore R+. These have a foam core and OSB top layer, providing an R-value of 3 or more. They click together fast.
A subfloor raises your finished floor by ¾ inch to 1½ inches. Plan your door trims, stair rise, and transitions accordingly.
Rim Joist Insulation
The rim joist area — where the floor framing meets the foundation — is a major heat loss point. Cut blocks of rigid foam to fit snugly between joists, then seal the perimeter with expanding spray foam. This step alone can cut drafts dramatically.
Also have an HVAC contractor verify your system can handle the added square footage. You’ll likely need extra supply and return registers, and a dedicated zone with its own thermostat keeps the basement comfortable without overworking the rest of the system.
Step 4: Plan Your Layout and Address Egress Requirements
Now you can sketch a floor plan. Treat the basement like any living space, not an afterthought.
Zoning Ideas
Think about how you want to live. Popular basement zones include:
- Home Theater / Media Room
- Home Gym or Yoga Studio
- Guest Suite (bedroom + bathroom)
- Playroom for Kids
- Home Office
- Wet Bar or Lounge
A typical layout might combine a media zone, a small bar, and a guest room. Always position bedrooms near an exterior wall for window access.
Egress Windows: Safety First
If you’re adding a bedroom, guest suite, or any sleeping area, building code requires an egress window. An egress window is a large operable window that provides an emergency exit. The International Residential Code (IRC) requires:
- A minimum net clear opening of 5.7 square feet.
- Minimum opening height of 24 inches and width of 20 inches.
- The sill height no more than 44 inches above the finished floor.
- A window well if the window is below grade, with a minimum 9 square feet of horizontal area and a ladder if the well is deeper than 44 inches.
Installing a new egress window often requires cutting into the foundation wall, which means a permit, a structural engineer’s approval, and a contractor. Budget $2,500 to $6,000 per window. Do not skip this step — it’s a safety requirement and a resale essential.
Permits and Inspections
Most municipalities require a building permit for finishing a basement, especially if you add walls, electrical, or plumbing. The permit process ensures your work meets safety codes. Electrical, plumbing, and mechanical permits are separate. Basement outlets must be GFCI-protected per the National Electrical Code, and bedroom circuits require AFCI breakers.
Smoke and carbon monoxide detectors are required in every sleeping area and on every level of the home. If your electrical panel is at capacity, you may need a sub-panel to handle the added circuits — an electrician can assess this during planning. Factor inspection timelines into your project schedule. Working without a permit can make selling your home a nightmare later.
Step 5: Layer Your Lighting for a Bright, Inviting Space
Basements lack natural light, so artificial lighting must do all the heavy lifting. A single ceiling fixture will make the space feel like a storage unit. You need three layers.
Layer 1: Ambient Lighting
Ambient light gives overall illumination. Recessed LED lights spaced evenly across the ceiling are the cleanest solution for low-headroom basements. Use 4-inch or 6-inch slim wafer lights (Halo or Lithonia brands) that need only ½-inch of clearance. Place them on dimmers for instant mood control.
A rule of thumb: space recessed lights about half the ceiling height apart. For an 8-foot ceiling, place them roughly 4 feet apart. Select a color temperature of 2700K to 3000K for a warm, residential glow — avoid 4000K “cool white,” which feels clinical.
Layer 2: Task Lighting
Task lighting serves specific activities. Install under-cabinet LED strips at a bar or kitchenette. Add adjustable wall-mounted reading lights next to a sofa or bed. In a home office corner, a quality articulating desk lamp directs light right where you need it.
Layer 3: Accent Lighting
Accent lighting creates depth and draws the eye. Use LED strip lights behind a TV, under a floating bench, or along a ceiling tray detail to make the room feel taller. Wall sconces flanking a piece of art or a mirror add a layer of polish. Even battery-operated picture lights can work if wiring is tricky.
Don’t forget: Use dimmer switches on every circuit. A space that’s bright for folding laundry can, with a single slider, turn into a cozy movie den.
Step 6: Choose the Right Flooring and Finishes
Your material choices now turn a construction zone into a finished room.
Flooring That Can Handle a Basement
The best basement flooring is dimensionally stable and moisture-tolerant. My top picks:
- Luxury Vinyl Plank (LVP) — 100% waterproof, soft underfoot, and available in realistic wood looks. Brands like Coretec and Flooret offer rigid-core options that install over most subfloors. It’s the champion of basement floors.
- Tile or Porcelain Tile — indestructible and completely waterproof. Perfect for bathrooms and wet bars. The downside is that it’s cold underfoot unless you add an electric radiant heating mat.
- Engineered Wood — only if your moisture readings are pristine and you use a gluedown installation over a sealed slab with an appropriate vapor barrier. Solid hardwood is a no-go; it will cup and warp.
Carpet
Carpet is cozy for a playroom or theater. Use a low-pile or Berber style and install it over a high-quality waterproof carpet pad. Make sure your slab has passed a moisture test before laying any carpet.
Wall and Ceiling Finishes
Paint the walls in light, reflective colors to bounce light around. I recommend Benjamin Moore White Dove OC-17 for walls — it’s a warm, soft white that never looks stark. Use Simply White OC-117 on the ceiling to make it feel taller. Always prime bare drywall with a mold-inhibiting primer (Zinsser Mold Killing Primer) before your color coats.
For ceilings, a suspended ceiling (drop ceiling) gives you access to plumbing and wiring but steals precious height. If you have at least 7 feet 6 inches, a drywall ceiling with access panels keeps it looking clean. In a basement with exposed joists, painting the ceiling a uniform matte black or deep charcoal creates an industrial-loft feel and maximizes height.
Step 7: Explore Popular Conversion Types (and Their Pros and Cons)
Before you furnish, clarify your primary goal. The table below breaks down popular basement conversions with honest pros and cons.
| Conversion Type | Description | Pros | Cons | Best For |
|---|---|---|---|---|
| Home Theater | Dedicated media room with projector or large TV, surround sound, and blackout options. | Immersive entertainment; uses low-light conditions to advantage. | Requires soundproofing and dark walls; can feel claustrophobic if not balanced with accent lighting. | Movie lovers and families who host game nights. |
| Gym / Yoga Studio | Rubber flooring, mirrors, wall-mounted equipment, and proper ventilation. | Convenience boosts consistency; no commute. | Needs ceiling height for jumping or overhead work; may require extra HVAC work for cooling. | Fitness enthusiasts with at least 7.5-foot ceilings. |
| Guest Suite | A bedroom with attached or nearby bathroom, closet, and egress window. | Adds significant home value; privacy for guests. | Must meet egress window code; plumbing costs can escalate quickly. | Homeowners who host overnight guests often. |
| Playroom / Kid Zone | Durable finishes, built-in storage, soft flooring, and a craft area. | Contains toy chaos; kids can play without disturbing upstairs. | Requires rigorous moisture control and easy-to-clean surfaces; must be safe with no exposed sharp edges. | Families with young children. |
| Home Office | Quiet workspace with built-in desk, good lighting, and data cabling. | Separates work from living space; no rent for coworking. | Lack of natural light can feel draining unless layered lighting is done well. | Remote workers who need focused quiet. |
| Bar / Lounge | Wet bar, seating area, mini-fridge, and entertainment setup. | Great for entertaining; adds a “wow” factor. | Plumbing and ventilation for a wet bar can get pricey; may encourage sink clutter. | Social hosts and couples who love hosting cocktail nights. |
Pick one primary function and design the layout and lighting to serve it first. Multifunction spaces work best when you divide them with furniture groupings, rugs, or partial walls rather than trying to do everything in one big open room.
Step 8: Pulling It All Together — From Dark to Dreamy
Once the walls are drywalled, the lights are on, and the LVP is clicked into place, the fun begins. Decorate with intention. In a basement, mirrors are your best friend — place a large leaning mirror across from a light source to double the brightness. Choose upholstery in lighter tones to lift the mood. Add plants that thrive in low light, like snake plants or ZZ plants, and pop them under a small grow light disguised as a decorative lamp.
It’s an extension of how you live — a movie night, a morning workout without leaving home, a guest space that feels genuinely welcoming. Every step from that first moisture assessment to the final dimmer switch made that possible.
Conclusion
I’ve seen too many basement remodels end in heartbreak because someone painted over a damp wall and framed it in. Do not let the excitement of picking finishes rush you past the moisture chapter. Fix the water first. Everything else — the insulation, the lighting, the decor — only works if the space is dry and stable.
Walk your basement with a flashlight, check the perimeter for damp spots, and make a list of everything that needs attention. If you’re unsure, call a reputable basement waterproofing contractor for a second opinion. Your dream basement is waiting — build it on a dry foundation.

